The CISCO VPN Client is a popular software application that allows end-users to connect a computer to a VPN (virtual private network). Once connected, the client computer can leverage the resources of the remote network in a secure environment as if connected directly to the local network. Unfortunately, a common error that can arise for users of the Cisco software application is the Cisco VPN Error 412. When thrown, the causes of the error will have to be corrected in order to regain full functionality of the VPN.
What is a VPN?
A VPN is a network configuration that allows for secure, client access from around the world. The primary purpose of a VPN is to provide access to network resources to approved end-users who are not co-located with the network. Some think of a VPN as a “virtual” LAN or network connection which can be used in a secure manner.
Conceptually, a VPN can also be thought of as a tunnel. Prior to use, the virtual network has to be configured on a computer or centralized server. Once setup, any computer with the appropriate login, password, and VPN configuration can connect to the remote resource to access information or software applications installed on the network or remote computer. When connecting individual computers, the VPN connection is explicitly called a tunnel.
Cisco VPN Error 412 Message
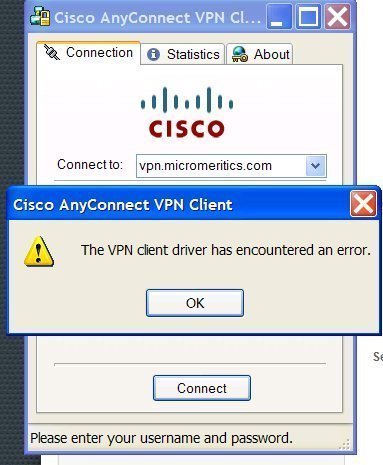
The specific wording of the Cisco VPN Error 412 will vary based on the version of the client software, but will look similar to the following:
Error Secure VPN Connection terminated locally by the Client. Reason 412: The remote peer is no longer responding.
What are the Common Causes of the CISCO VPN 412 Error?
One of the most frustrating aspects of the 412 error is that there are a number of potential causes that require troubleshooting in order to solve the issue. The causes of the 412 error include:
– A network device or network interface card has failed (hardware failure).
– There is significant packet loss or delay being experienced due to a poor network connection. This can cause the VPN session to drop throwing the error.
IPSec, IP protocol 51 and UDPport 500 are required
– An Access Control List (ACL) or network firewall is blocking the required ports or protocols for the VPN to function appropriately.
– If using IPSec, UDP port 500 and IP protocol 51 are not available.
– If using PPTP, TCP port 1723 and IP protocol 47 are not available.
– The client computer is behind a network firewall which is blocking ESP or UDP ports 4500/500.
– The Internet connection is not stable and there are network packets that are not reaching the server or conversely, there are network packet replies from the server that are not reaching the client computer.
– The client computer is located behind a NAT device and the VPN server does not have NAT-T enabled. In this case, the VPN client will connect, but will not be able to send or receive traffic. After a set amount of time, the client will delete the VPN tunnel.
– The VPN client program is attempting to connect using TCP and the default TCP port 10000 for NAT-T is blocked.
What are the Primary Uses of VPNs?
There are a wide range of uses for VPNs in today’s computing world. These range from the desire to remain anonymous to sharing centralized computing resources.
Enhancing Security with a VPN
One of the most common reasons for using a VPN is to enhance security. Security enhancements can range from an individual user who sets up a VPN on the home computer that is in a secure location. Then, while he or she is on the road, public WiFi connections can be used to connect to the home VPN to securely access the Internet and any resources saved or installed on the home computer since the VPN connection is encrypted. Similarly, at the small business and enterprise level, employees can securely access company or organization resources through the use of a VPN.
Sharing Data and Installed Applications
Another common use of a VPN is to share files or applications with remotely located computers or computing devices. Most smart phones, tablets, or laptops can now be setup to access a VPN and use files that are saved on home or work computer or network. Depending on the configuration of the VPN, the main computer can be used as if the end-user is physically located with the device.
Remaining Anonymous
Remaining anonymous is a more common reason for VPN use by single users vice enterprises or small businesses. A number of VPN service providers make VPN access available to end-users with the sole goal of helping the user access the Internet from an anonymous IP address.
Avoiding Location-Based Restrictions
Over the past decade, another popular use for VPNs has emerged; avoiding location-based restrictions on Internet-based services. This use predominantly arises with British or American expats who want or need to access services based in the United States or United Kingdom which for a variety of reasons do not allow the service(s) to be used outside of the parent country. By connecting to the Internet through a VPN server based in the desired country, an end-user can visit the desired website or service and appear to be based in the targeted country. Although many consumers make use of this aspect of a VPN to use entertainment-based sites such as BBC’s iPlayer, Netflix, and Hulu, the service can also be leveraged for using other web services that are location-based.
How Do You Setup the Cisco VPN?
The Cisco VPN client application is a popular software program that allows a client computer to connect to a remotely located VPN (virtual private network). Once connected, the end user can access the resources of the private network or computer as if physically or directly connected to the computer. The Cisco client application is most commonly used by schools and businesses since it offers a secure remote connection for end-users to access the files, tools, and programs located on the school or business network while away from the workplace or campus. Due to the Cisco VPN client requiring specialized access to the local network, there are some specific procedures required to complete the setup and configuration of the program before first use. Ensuring the client is configured properly is one of the basic troubleshooting steps in solving the Cisco VPN 412 error.
Step 1 – Download and install the Cisco VPN client on the target computer. If your organization promotes or requires the use of the client, then download the application from the location provided by the network administrator. Alternatively, the program can be downloaded for free here.
Step 2 – Note the information required to setup the Cisco VPN client on the target network. This will include the IP address or hostname of the remote VPN server, the name of the Internet Protocol Security (IPSec) group assigned to your account by the network administrator, and the IPSec password required for the group. You will also need the username and password that you would normally use to access the server locally.
Step 3 – Restart the computer after the Cisco client has been installed. Then, launch the Cisco VPN program and access the “VPN Dialer” on the local computer. It will normally be saved under the “Programs” sub-menu of the Windows “Start” menu.
Step 4 – Select the menu option to configure and create a new connection entry.
Step 5 – Once the primary dialog box of the program is launched, select the “New” menu button. This will launch the “New Connection Entry Wizard.”
Step 6 – Enter the desired name in the text field for the “Name of the new connection entry.” Most VPN users will enter a short, descriptive name for the connection in order to differentiate the connection from future VPN entries. Then, click the “Next” menu button.
Step 7 – Enter the hostname or IP address of the remote VPN server. Then, click the “Next” menu button.
Step 8 – Input the required “Group Access Information.” In the “Name” field, the name of the IPSec group is required to be entered. Then, enter the IPSec group password in the “Password” and “Confirm Password” fields. These entries are case-sensitive unlike other Windows passwords. Click the “Next” menu button to proceed to the next step of the configuration process.
Step 9 – Ensure the correct name is in the connection entry field. Then, select the “Finish” menu button.
Step 10 – View the new VPN connection located in the “Connection Entry” drop-down box located on the primary dialog window of the Cisco Client.
Steps to Fix the Cisco VPN 412 Error
Once verifying that the Cisco VPN client is setup properly, there are a number of additional troubleshooting steps that can be undertaken to solve the problem(s) throwing the error.
Step 1 – If the client computer is connecting to the Internet using a WiFi connection, try to connect using an Ethernet or USB connection. This will help eliminate the possibility that the WiFi connection is not providing sufficient connectivity.
Step 2 – Temporarily turn off the computer’s firewall and test the VPN connection. If the 412 error no longer occurs, then the cause of the error is needing to add firewall exception rules for the ESP protocol, port 500, and port 4500.
Step 3 – Enable or turn on the NAT-T/TCP option in your profile and ensure that port 10000 is unblocked in the computer’s firewall.
Step 4 – Update the ForceKeepAlive=0 to 1 in your profile.
Step 5 – If the VPN continues to throw the 412 error, then change the computer firewall settings to allow or permit UDP ports 500 and 62515 which are required for the Cisco VPN client.
Step 6 – Ensure the Cisco VPN client is actually sending data packets. To do so, open a console or command prompt window. Then, enter the command, “netstat –s –p ip 60” followed by pressing the “enter” key. This will let you see the IP end and receive packet counts.
Sundown of the Cisco VPN Client
Despite the popularity of the Cisco VPN Client program, the company announced the “end of life” of the software in the summer of 2011. Product sales were cutoff in the summer of 2012, and company support for the software will continue through 2014. For current users of the program, Cisco is actively recommending migration to the AnyConnect Secure Mobility Client.
How to Setup the Cisco AnyConnect Security Mobility Client
The Cisco AnyConnect Security Mobility Client is the succeeding technology to the legacy Cisco VPN Client software application. The new Mobility Client is designed to support both the Windows and Mac OS X operating systems. The following are the instructions to successful install the client on each of the respective OSs.
Steps to Setup Cisco AnyConnect Security Mobility Client (Windows)
Step 1 – Login to the computer with a user account that has administrator level access.
Step 2 – Download the VPN installer from the repository setup by the network administrator. The filename will be something similar to “anyconnect-win-xxxx.msi,” where “xxxx” will be a series of numbers representing the specific build of the software.
Step 3 – Once the installation msi file is downloaded to the target computer, double click the file to launch the installation and setup wizard.
Step 4 – Select the “Next” menu button and accept the EULA (end user license agreement) followed by clicking the “Next” button again.
Step 5 – Choose the “Install” menu button when prompted by the installation wizard.
Step 6 – Choose the “Yes” menu button on the Windows User Access Control (UAC) dialog box that is launched to continue with the installation process.
Step 7 – Select the “Finish” menu button when prompted by the installer to complete install of the software client.
Step 8 – Launch the Cisco AnyConnect application by double clicking the program icon located in the “All Programs” sub-menu of the Windows “Start” menu.
Step 9 – Enter the hostame or IP address for the VPN server and select the “Connect” menu button.
Step 10 – Input the username and password for your network account that will be accessed via the VPN.
Step 11 – Select the appropriate menu option to connect to the VPN. After successfully connecting to the service, the AnyConnect program logo will be minimized in the task bar of the computer.
Steps to Setup Cisco AnyConnect Security Mobility Client (Mac OS X)
Step 1 – Download and install the VPN installer for Mac OS X from the location that your network administrator has made available.
Step 2 – Open the disk image and launch the file named, “vpn.pkg” to start installing the AnyConnect client.
Step 3 – When the “Welcome to AnyConnect…” screen is displayed, select the “Continue” menu button.
Step 4 – Accept the EULA, choose the “Continue” menu button, and then select the “Agree” button located on the slide-down menu.
Step 5 – When prompted with the “Select a Destination” menu option, choose the primary hard drive or installation drive of the computer followed by selecting the “Continue” menu button.
Step 6 – Choose the “Install” menu button on the install window labeled, “Standard Install…”
Step 7 – When prompted, enter the administrator username and password for the local computer.
Step 8 – Once installation has concluded, select the menu button labeled “Close” to finish installing the Cisco AnyConnect Client on the Mac OS X computer.
Step 9 – Launch the AnyConnect Client to configure the VPN server, username, and password for the new connection.


JabberBoxer
I know this is an old post but
I solved with this set of steps…
On the VPN Client… Click on Modify after selecting the connection entry. Click on Transport Tab. To enable IPSec over TCP, click the radio button.
JabberBoxer
I know this is an old post but
I solved with this set of steps…
On the VPN Client… Click on Modify after selecting the connection entry. Click on Transport Tab. To enable IPSec over TCP, click the radio button.
Jale Mirzaei
Thanks alot for your helpful information.
no chance I could find out that the problem can be solved through adding ForceKeepAlive=1 in profile…
I am overwhelmed with gratitude for your help
The best,
John Harrington
Hi! I saw a post on Fiberlink’s website that addressed this error specifically. The author of the post stated:
“You may need to work with your network administrator or help desk to make sure your account is ok (not locked) and you’re using the correct credentials.
If you’re using tokens, make sure the token key is synchronized.
In some cases, if you’re connected and then get disconnect with this error, uninstalling and re-installing the VPN client may help.
Sometimes a firewall or anti-virus policy mismatch needs to be checked.”
I hope these tips help some of you. To view the rest of the post click here: http://links.maas360.com/CiscoVPNerror413
Tim
Hello, I’ve had a heap of trouble with this 412 thing, your advice helped (UseLegacyIKEPort=1) also i found you can add. ForceKeepAlive=1 to stop the dropping out too.
Thanks, Tim
Sebastian
Add the UseLegacyIKEPort=1 option in the .pcf file.
Jo Laws
Hey fred, have you tried turning off your windows firewall and prehaps instead of using a router firewall, plug the computer direct into the internet port via an inbuilt modem or something similar, or disable your antivirus while using the VPN software 🙂
Fred Ferland
Hello,
we tried all of the above and we’re unable to determine the problem. The conenction drops after 2-3 mins. Any recommendation ? Thanks.