Bandwidth Usage in ISA Server
Network performance can depreciate because of a number of issues. With ISA Server, you can use bandwidth priorities and bandwidth rules to set propriety levels for traffic. Effective bandwidth is the terminology used to describe the data transfer rate available to clients through dial-up connections or dedicated Internet connections. Bandwidth rules make it possible for you to set the priority for requests.
Bandwidth rules are configured by specifying a number of policy elements:
-
Protocol definitions
-
IP addresses and users
-
Destination sets
-
Schedule
-
Content types
-
Bandwidth priority
The Bandwidth priority policy element is used to set priority values for incoming bandwidth and outgoing bandwidth. Once defined, you can apply bandwidth priorities to specific Internet connections through bandwidth rules. Before you can create bandwidth rules, effective bandwidth of the Internet connection must be specified. This enables ISA Server to effectively enforce bandwidth priorities.
Bandwidth priorities are configured based on direction:
-
Outbound bandwidth: Refers to the bandwidth priority assigned for requests from internal clients for Internet objects.
-
Inbound bandwidth: Refers to the bandwidth priority assigned for requests from external clients for local network objects.
Bandwidth priority is assigned as a value between 1 and 200. Default Bandwidth Priority is an ISA Server bandwidth priority that assigns 100 for outbound bandwidth and inbound bandwidth. You can use the ISA Management console to create new bandwidth priorities. To create a new bandwidth priorities, right-click the Bandwidth Priorities folder, and select New and then select Bandwidth Priority from the shortcut menu.
To set effective bandwidth, you first have to determine the maximum effective bandwidth of the connections on the ISA Server computer or ISA Server array. For dial-up connections, you configure effective bandwidth through its associated dial-up entry in the ISA Management console.
Maximum effective bandwidth for a frame relay network is determined by the wide area network (WAN) provider. For a dedicated network connection, effective bandwidth is set in the ISA Management console by configuring bandwidth rules.
When you determine bandwidth requirements for internal communication, you have to include the different types of communication:
-
Communication between computers on your local network
-
Communication between array members in the ISA Server array.
-
Communication when content is returned to a local network computer from the ISA Server computer.
How to configure a new bandwidth priority
-
Open the ISA Management console.
-
Expand the Policy Elements folder in the console tree.
-
Right-click the Bandwidth Priorities folder and select New and then Bandwidth Priority from the shortcut menu.
-
The New Bandwidth Priority dialog box opens.
-
In the Name box enter the name of the bandwidth priority.
-
In the Description (Optional) textbox, enter a description for the bandwidth priority.
-
In the Outbound Bandwidth (1-200) textbox, specify outbound bandwidth.
-
In the Inbound Bandwidth (1-200) textbox, specify inbound bandwidth.
-
Click OK.
How to configure a bandwidth rule
-
Open the ISA Management console.
-
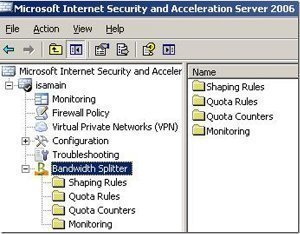
Navigate to the Bandwidth Rules folder.
-
Right-click the folder and select New Rule from the shortcut menu.
-
The New Bandwidth Rule Wizard launches.
-
In the Name box enter the name of the bandwidth rule.
-
In the Description box, enter a description for the bandwidth rule. Click Next.
-
Choose between the following options:
ul type="disc">
-
Apply This Rule to All IP Traffic
-
Selected Protocols
-
Except Selected Protocols
Specify the selected protocols and then click Next.
-
You next have to define the schedule for the rule. This schedule defines when the rule will be enforced. Click Next.
-
Set the client type, and then click Next.
-
Specify the destinations that the rule applies to.
-
-
All Destinations
-
All Internal Destinations
-
All External Destinations
-
Specified Destination Set
-
All Destinations Except the Selected Set.
-
-
Specify the destination set if necessary. Click Next.
-
Select the content group. Options include:
-
-
All Content Groups
-
Selected Content Groups
-
Click Next.
-
On the Bandwidth Priority page, specify the bandwidth priority.
-
Click Next and then click Finish.
How to set the bandwidth priority for a bandwidth rule
-
Open the ISA Management console.
-
Select to the Bandwidth Rules folder.
-
Right-click the bandwidth rule which you want to configure and select Properties from the shortcut menu.
-
Click the Bandwidth tab.
-
If you want to use the default bandwidth scheduling priority, select the Default Scheduling Priority option.
-
If you want to set your own bandwidth priority, select the Specified Priority option.
-
Use the Name drop-down list box to choose a bandwidth priority for the bandwidth rule.
-
Enter outbound bandwidth and inbound bandwidth.
-
Click OK.
How to set the order of a bandwidth rule
-
Open the ISA Management console.
-
Select to the Bandwidth Rules folder.
-
Right-click the bandwidth rule which you want to set the order for and select click Move Up or Move Down from the shortcut menu to set the order of the bandwidth rule.
How to configure effective bandwidth for a dial-up connection
-
Open the ISA Management console.
-
Navigate to and expand the Policy Elements node.
-
Select the Dial-up Entries folder.
-
Right-click the dial-up entry and select Properties from the shortcut menu.
-
Click the Bandwidth tab.
-
Select the Enable Bandwidth Control checkbox.
-
Enter the effective bandwidth value in the Effective Bandwidth (Kbit/Sec) textbox.
-
Click OK.
How to configure effective bandwidth for a network card
-
Open the ISA Management console.
-
Navigate to the Bandwidth Rules folder.
-
Right-click the Bandwidth Rules folder and select Properties from the shortcut menu.
-
When the Bandwidth Rules Properties dialog box opens, select the Enable Bandwidth Control checkbox on the General tab.
-
Enter effective bandwidth for the dedicated network connection in the Effective Bandwidth (Kbit/Sec) textbox.
-
Click OK.


Follow Us!