 One of the things that many computer users do once they record or download a video is edit it to fit their needs. Whether someone is making a home movie, creating a mash up, or adding features such as subtitles, he/she will need to edit the video file. Here are some tips on editing one of the most common video files available – WMV.
What is a WMV File?
Before playing WMV files, it is important to know a little more about this format. Microsoft originally developed the WMV (Windows Media Video) file. While WMV was developed for streaming, users can easily watch WMV files stored on their hard drive or other media. The current WMV version is WMV9. In order to play a WMV file, a special codec is needed. A codec is software that can easily read a file format and create video images and audio from the data provided. The WMV codec is available in Windows Media Player and other media players. Most of these media players are available for download for free.
Use Editing Software to Edit WMV Files
In order to edit WMV files, special editing software must be used. Most editing software are not free and can cost from $20 to several hundred dollars for professional tools. However, one software product that is powerful, has many features, and is free is Movica. Movica is an editing application that easily edits WMV files. Also, it has a graphic user interface, making it extremely easy to use.
Install and Launch the Editing Software
As stated above, a simple program called Movica will be used as the example in this article. Once Movica is installed on the computer, launch it.
Open a File to Edit
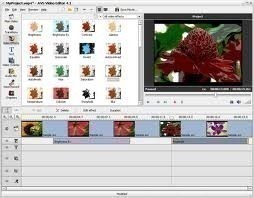
With this software, users can launch the program then choose the Open option from the top toolbar. This allows all files that the software supports, including WMV files, to be viewed. The program should display a WMV file thumbnail. Once it is located, double click the file.
Select Scenes to Edit by Playing the File
The easiest way to start the editing process is to select the part of the file to edit. This can be done easily within Movica by playing the file. The play, forward, reverse, pause, and stop buttons at the top can be used to easily locate the part of the file to be edited. In addition, the “set a starting point” and “set an ending point” buttons can be used to easily narrow down the selections.
Start the Editing Process
Many types of editing can be done to a video, including extending a scene, cutting out a scene, disjointing a scene, etc. However, with Movica and other types of editing software, users can easily find information within the software on how to create their specific effect or edit.
Proof the Edit
Once an edit is complete, do a dry run or “proof it” to make sure that the edit was done correctly. Proofing the edit usually only requires playing the edit back with the software. If the edit is not satisfactory, the user can re-edit and proof it repeatedly, constantly tweaking it until it is perfect for his/her use.
Finalize the Edit
Once the edit has been proofed and the results are completely satisfactory, finalize it. Finalizing is when the editor incorporates the edit into the file and formally saves it. However, once the user saves a file, he/she will not be able to go back to the original, unless he/she has saved a spare copy.
Save the File to a Recordable Medium or Send to Friends/Family
Now that the edit has been finalized, save it to a hard drive, burn it onto a CD/DVD, or transfer it via the Internet to friends and family.
It should be noted that Movica is a free, open source video editing application. Movica can be downloaded Here.


Follow Us!