Joomla is a popular content management system meant to make building web sites easier and faster.
To install Joomla you will need the following basic requirements met:
- A web host with a database (MySQL), web server (usually Apache), PHP
- A domain name under which you would install Joomla, unless this is a local install on a local server in which case you can use the local IP address.
- FTP/SFTP client. Examples are Filezilla on Windows and Linux, Cyberduck on Mac.
Installing Joomla Step By Step
1. Download Joomla from Joomla.org, unarchive it, and upload the files to your web host using your FTP client as mentioned above. If you upload to the web root directory (named www, public-http or alike) it will display at your main domain name such as yourdomain.com. If you put it in a subdirectory it will display in yourdomain.com/subdirectory.
2. Go to your domain (or subdirectory) to start the installation. It’s pretty much all about following on-screen prompts at this point.
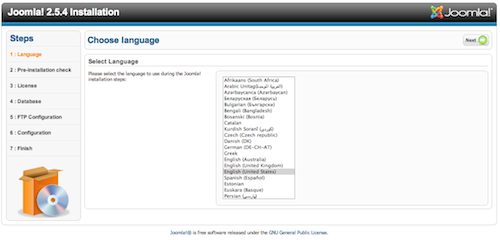
3. Select language and click next.
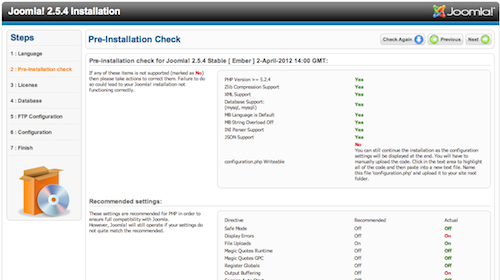
4. Check the installation requirements in the pre-installation check. If you get a “No” on “configuration.php Writeable” you can safely ignore it and move on.
5. Agree to the license.
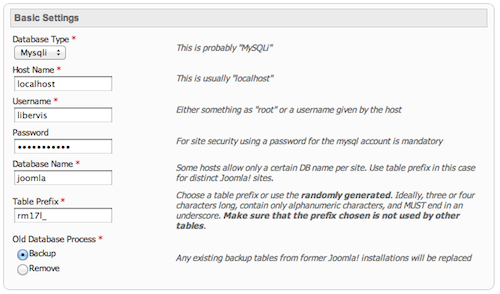
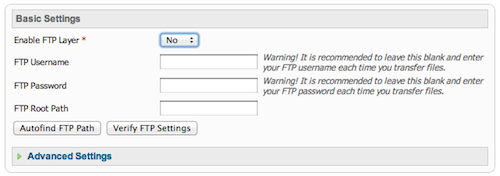
6. Enter the username, password, and the name of your database. Your web host should provide you with one, and a web panel (like phpMyAdmin) where you can log in and create, remove or manage your databases. Create one with any name you like (just “joomla” is fine) and enter it here. You can skip the next screen with FTP settings, which are optional.
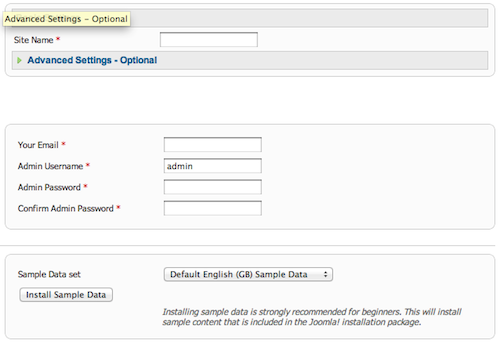
7. Enter the main configuration settings for your new Joomla install, including site name, your email address, and desired username and password of your administrator account. You also have an option to install sample data, which will fill in some example content to your new Joomla site so you can play with it and see how it all works and looks like.
8. Copy the configuration code provided, make a new file called configuration.php in the root directory of your joomla installation, paste the code into it, and save it.
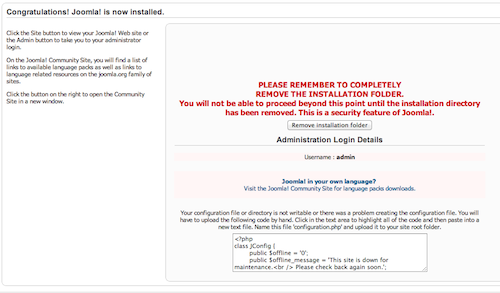
9. Remove the installation folder from your joomla directory, for security reasons.
10. Login to your admin area at yourdomain.com/administrator/ using the administrator username and password you set during installation. In the admin area you can edit various settings for your site as well as its content.
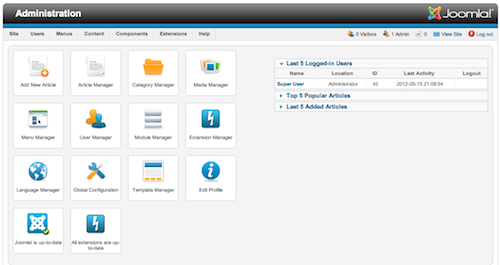
You can consult Joomla.org for all further information about setting up and managing your new Joomla site.



Follow Us!