Flickr is a website that helps users store and share photos online. Users can also easily find friends who use Flickr by linking up with their email or Facebook. Users must create an account to upload pictures, but can browse galleries without creating an account.
Create a Flickr Account
Users can sign in to create an account with their Yahoo, Google, or Facebook account. A user who does not already have one of these accounts can click Create an account and will be redirected to register with Yahoo to create an account for email and other web services (including Flickr).
A pop-up window will appear prompting users to:
* Personalize their profile
* Upload their first photos
* Find their friends on Flickr
How to Personalize a Profile
1. Click Personalize your profile. First, you will be prompted to create your buddy icon. This is a profile picture of you. Click Find an image on my computer then click Choose File. Browse through your picture library and select picture. Click Upload or you may choose Skip this step. Crop your picture to fit into the square box by clicking on the arrows and dragging it to the desired size. Click Make the Icon. You will be directed to the following page. Click Next to move forward or I want to make a different icon to select a different picture for your buddy icon.
2. Choose your custom URL to send your contacts a direct link to your photos. Select an alias for your URL. This cannot be changed. Click Ok, Lock it in and continue, or I need to choose a different alias.
3. Supply your personal information: Name, timezone, gender, relationship status, and a short description of yourself. You may click Want to format your description? and a pop up window of HTML tags will be supplied to help style your text.
Upload Photos
Note: For free basic accounts, you can upload photo files up to 10 megabytes and upload 100 megabytes of photos each month. If you pay $25 a year for a Flickr Pro account, you can upload files up to 20 megabytes. Both account types also let you upload video clips of 90 seconds or less. Free accounts can upload two videos a month. Pro account holders can upload an unlimited amount of videos, although the video files must be smaller than 500 megabytes in size.
1. Click Upload your first photos. Browse through your picture library and select pictures. Clicking Ctrl-A on a PC or Cmd-A on a Mac selects all the pictures in a folder so you do not have to select them one by one. Click Upload. An onscreen progress bar will be displayed as it uploads.
2. Set privacy settings by checking the box next to public or private. If you select private, you can choose to allow friends or family by checking the boxes. Click Upload photos and videos.
3. For more uploading options, click the Flickr Tools page. Here, you can download the Flickr desktop uploader, which makes it easier to upload large quantities of pictures and you can manage your pictures even while offline.
4. Once your photos are uploaded, add titles, descriptions, and tags to your photos. After typing these descriptions, click the blue Save button at the bottom of the page.
Creating and Editing Sets
Sets are Flickr’s equivalent to picture albums. The sets organizer is very simple to use.
1. Place the cursor over Organize and Create and click Your Sets. On the following screen, click the big blue Create your first set.
2. Drag your photos from the display at the bottom of the page. Rearrange them if you need to by dragging them to the left or right.
3. To remove a picture from the set, drag it back down to the collection of pictures.
4. You can also add tags, titles, and descriptions by double clicking the picture and filling in the information in the window that pops up.
5. Name the set and add a description in the window on the screen’s left side then click Save.
6. You can also edit your photos in this screen. In order to edit more than one picture at a time, click Batch Organize at the top of the page. You can change all the pictures to the same date, add people, add tags, or add other sets to the one you are currently creating.
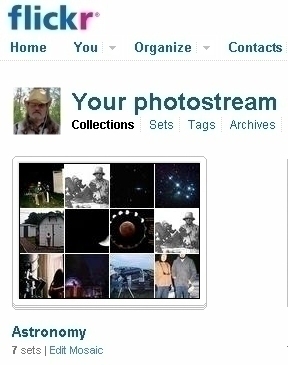
7. To get out of the sets screen, click Your Photostream in the top right hand corner. Your sets will now appear on the homepage’s right side. You can edit your sets by clicking edit set under the picture.
Printing Pictures
Flickr has partnered with Snapfish to allow you to order prints, cards, collages, and even get pictures printed on canvas to make ready-to-hang art.
1. Click Print and Create sets. Drag the photos you want from the bottom.
2. Use the menu on the left to select printing options. Select among the options to get the pictures you selected in different sizes in the form of cards, collages, calendars, and more.
3. A window will pop up directing you to make an account on the Snapfish site.
Find Friends on Flickr
You can easily find your friends to share your pictures with by importing your Facebook friends and email contacts.
1. Click Contacts from the homepage. Click Find your friends.
2. You will be redirected to a screen where you can choose to import contacts from Gmail, Yahoo, Facebook, and Hotmail. Click Go and your contacts will be searched to find other Flickr users.
3. Select individuals to add as contacts by clicking Add as contact. You will then be able to label your selected contact as a friend or family member. Your Contacts will be able to view your profile according to your privacy settings.


Follow Us!