WAMPServer is a web development combination of Apache, MySQL and PHP for Windows. All the components are well integrated together and its installation is highly automated. Earlier were the days when each component had to be installed separately and then configured to connect with each other. But thanks to the WAMP team who has made running a server so easy and effortless.
Prerequisite
1. You should be running any of the Windows operating system.
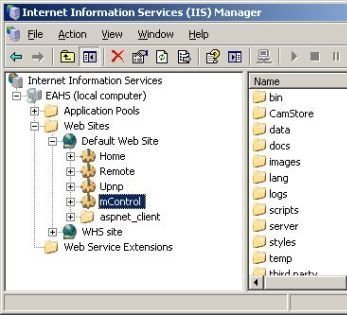
2. If you have any other server running – like IIS – stop and disable it for WAMP to function correctly.
Installation
Step 1: Download the WAMPServer installer by choosing among 32-bits and 64-bits version depending on what Windows you are running. Also, see the required configuration of all the components.
Example: WAMPServer 2.2D has Apache 2.2.21, Php 5.3.10, Mysql 5.5.20, XDebug 2.1.2, XDC 1.5, PhpMyadmin 3.4.10.1, SQLBuddy 1.3.3 and webGrind 1.0.
Step 2: Run the downloaded installer to initiate the setup. If the option of Run as administrator is available, make use of it. Complete the setup by following all wizard instructions until the end. WAMPServer will require around 200MB+ space on the disk you install it. It’s recommended to install WAMP on C:/wampserver or C:/wamp, though not mandatory.
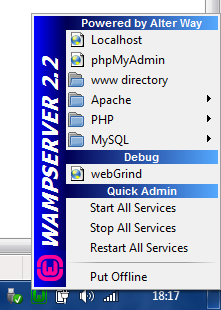
Step 3: Start WAMPServer by clicking the shortcut icon created on your desktop. Again, use Run as administrator if available. The icon appears in Windows Notification Area (right-bottom) turning from Red to Orange to Green. Red denotes that the server is inactive/disabled. Orange indicates the server is processing or starting up. Green indicates the server is active and running.
To check whether WAMPServer is running correctly – open a browser and type
http://localhost
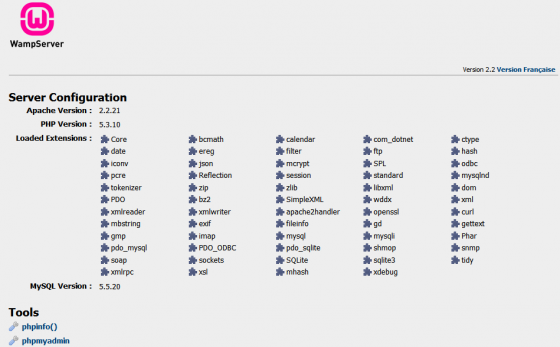
You should see a WAMPServer Homepage showing Server Configuration, Tools, Your Projects, Your Virtual Hosts and Your Aliases.
Setup or Configuration
Once WAMPServer is installed, it’s time to configure the server environment as per your requirements.
Single left-click on the WAMPServer icon shows a menu – localhost, phpMyAdmin, www directory, Apache, PHP, MySQL, webGrind, Start All Services, Stop All Services, Restart All Services, and Put Online/Offline.
Activate the required Apache modules from Apache > Apache Modules (ticked indicate enabled). httpd.conf, Apache error log and Apache access log files are also available.
Enable all required PHP settings and extensions via PHP > PHP Settings and PHP > PHP Extensions. It’s recommended for novice users to not modify the php.ini file manually, instead operate it via the menu only. Logged PHP errors can be found at PHP > PHP Error Log.
You can also access
http://localhost/?phpinfo=1
and
http://localhost/phpmyadmin/
on your browser. phpMyAdmin is used to manage MySQL databases and related operations.
Test a Sample HTML File
Create a simple HTML file called wamptest.html and copy it at C:/wamp/www/ or C:/wampserver/www/ (or wherever you have installed it). Open your browser and type localhost/wamptest.html and it should open the page.
That’s it! You’re all set to start developing your projects and playing with them.


Jane Allison
I tried this, but it didn’t work. The wamp support person said I must use virtual host, which I don’t understand. He is actually quite rude and belittles me because I don’t know how to do it. Can you help? The browser says “server not found” when I try to open my project.
johannes Kingma
Why not stop complaining about adblockers and make this a payed service. You probably get more money out of it.