Having a glossy logo is common with today’s sleek website interfaces. Creating one yourself is simple with the right software and a set of instructions to walk you through the basics.
You will need to open your version of Adobe Photoshop (This tutorial uses 7.0, but all versions carry the same tools and can produce similar results). Once Photoshop has opened, create a new document using the dimensions you are comfortable using for your logo.
For this example, we are using a custom document size of 500 pixels wide and 500 pixels tall with a resolution of 300 pixels per inch in RGB color.
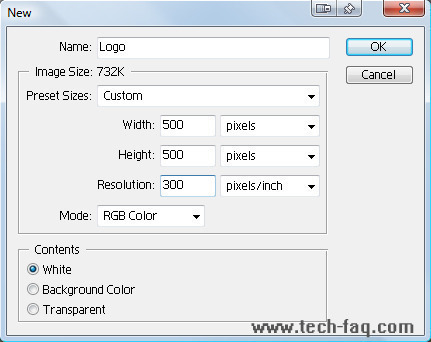
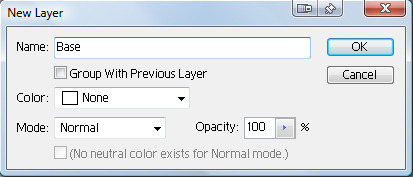
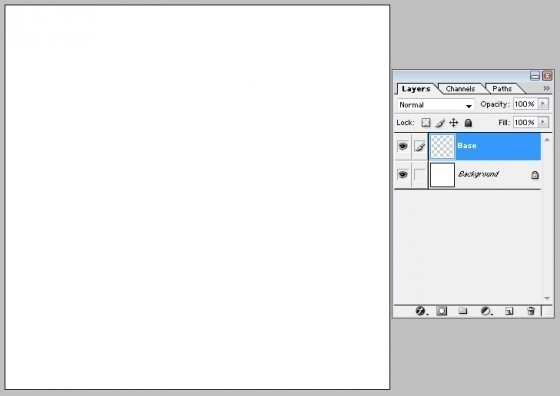
The document which you have created will have a default background layer set to white (Hex code #FFFFFF). Create a new layer (shortcut Ctrl+Shift+N) name it to “Base” and select “Ok”
Your document now has a transparent layer “Base” over the background layer. Choose the shape tool and use the “Ellipse” and “Fill Pixels” option so that you can create a circle of any color on your transparent layer. (hold the shift key while creating the circle to keep it uniform).
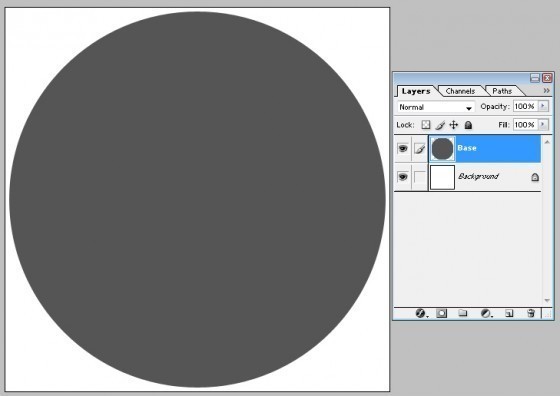
For this example, we have left the “Anti-aliased” option checked to create a smooth dark gray circle.
Now that you have created the circle, you will right-click on the “Base” layer to select the “Duplicate Layer” option. It will create a “Base copy” layer. Double click your mouse pointer on the name of the layer to change it to “Shadow” then click on the “Eye” button to make the layer invisible.
Repeat the process again and create a copy of the “Shadow” layer. Rename it to “Gloss” and make the layer invisible as well. We will use these layers later.
You now need to right-click on the “Base” layer to open up the “Blending Options” for the layer. This will open up a window titled “Layer Style” with several values which can be changed to manipulate the layer you have chosen.
The particular options we will be changing on this layer are very minimal but should be followed to create the necessary effect.
Select the “Drop Shadow” tab and replace the default values with the following:
- Blend Mode: Multiply, Color Black (Hex Code #000000)
- Opacity: 75%
- Angle: 120 Degrees (Use Global Light Checked)
- Distance: 0 Pixels
- Spread: 15%
- Size: 21 Pixels
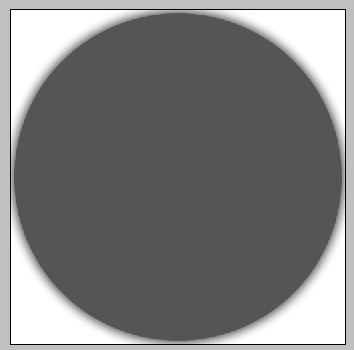
Select the “Gradient Overlay” tab and replace the default values with the following:
- Blend Mode: Normal
- Opacity: 100%
- Gradient: Select the gradient bar then choose the color with transparent blend (second box), make sure that the color selected is white Hex Code #FFFFFF
- Style: Radial (Align with Layer checked)
- Angle 90 Degrees
- Scale: 100%
Note: The sphere of white mass that you see needs to be moved down to the bottom of the circle so that the white peaks over the bottom border. To do this you will need to hold down the “Shift” key then using your mouse pointer, drag the gradient on the Canvas down. (Preview must be enabled to accurately move the gradient to the right location).

Select the “Stroke” tab and replace the default values with the following:
- Size: 3 pixels
- Position: Inside
- Blend Mode: Normal
- Opacity: 100%
- Fill Type: Gradient
- Style: Linear (Align with Layer checked)
- Angle: 90 Degrees
- Scale: 100%
With the completion of the stroke style input, you are done with this layer. Push “OK” and the changes will be applied.
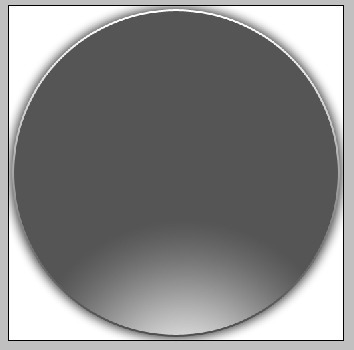
Now you will need to select the “Shadow” layer to make it visible. It will cover up your base layer with a plain circle. You should be able to see the edge of the drop shadow from the base layer.
You will need to right click on the “Shadow” layer and select “Blending Options” to pull up the Layer Style options.
The steps you fulfill on this layer will bring out the shadow for the logo.
Select the “Blending Options: Custom” tab and replace the default values with the following:
- Blend Mode: Normal
- Opacity:100%
- Fill Opacity: 0%
This will make the circle “filling” invisible although the next alterations to the layer will still happen where the “filling” of the circle is on the layer.
Select the “Gradient Overlay” tab and replace the default values with the following:
- Blend Mode: Darken
- Opacity: 100%
- Gradient: Select the gradient bar then choose the color with transparent blend (second box), make sure that the color selected is black Hex Code #000000 (Reverse box checked)
- Style: Linear (Align with Layer checked)
- Angle: 157 Degrees
- Scale: 100%
Note: The gradient of black mass that you see needs to be moved left to the side of the circle so that the black covers the top left and left of the border. To do this you will need your mouse pointer, drag the gradient on the Canvas to the left. (Preview must be enabled to accurately move the gradient to the correct location).
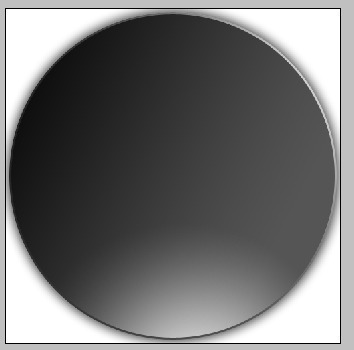
Select the “Stroke” tab and replace the default values with the following:
- Size: 3 Pixels
- Position: Inside
- Blend Mode: Normal
- Opacity: 0%
Note: This will remove the stroke border to allow the stroke style from the “Base” layer to show through. Select “OK” to apply the changes to the layer style for the “Shadow” layer.
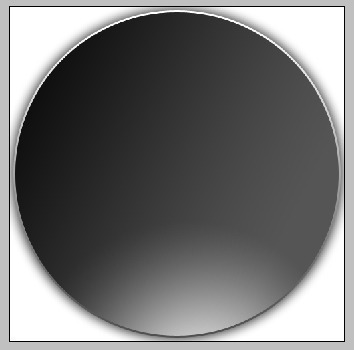
Next, select the “Gloss” layer to make it visible. You will need to choose the “Selection” tool and right click on the canvas to pull up the select menu. Choose “Free Transform” from the list and a selection box should envelope the circle. On the top toolbar, there should be some values. You need to replace the following:
- W: 75%
- H: 60%
Then left click on the canvas once and press the “Enter” key to apply the changes. You should be left with a gray, egg-shaped Ellipse which should be moved to the top of the canvas, meandering a little to the left.
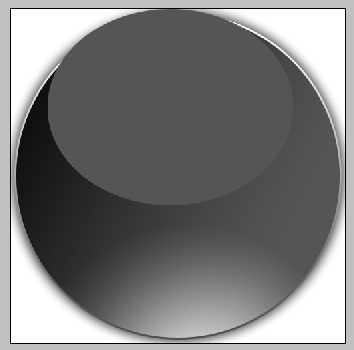
Right-click on the “Gloss” layer and open up the “Blending Options” window and fulfill these changes to complete the glossy look.
Select the “Blending Options: Custom” tab and replace the default values with the following:
- Blend Mode: Normal
- Opacity:100%
- Fill Opacity: 0%
This will make the ellipse “filling” invisible although the next alterations to the layer will still happen where the “filling” of the ellipse is on the layer.
Select the “Gradient Overlay” tab and replace the default values with the following:
- Blend Mode: Normal
- Opacity: 100%
- Gradient: Select the gradient bar then choose the color with transparent blend (second box), make sure that the color selected is white Hex Code #FFFFFF (Reverse box checked)
- Style: Linear (Align with Layer checked)
- Angle: 123 Degrees
- Scale: 73%
Note: The gradient of white mass that you see needs to be moved up to the left side of the ellipse so that the white washes down the top left of the border. To do this you will need your mouse pointer, drag the gradient on the Canvas until it looks similar to the following image. (Preview must be enabled to accurately move the gradient to the correct location).
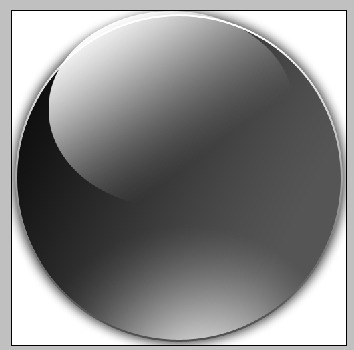
Select the “Stroke” tab and replace the default values with the following:
- Size: 21 Pixels
- Position: Inside
- Blend Mode: Normal
- Opacity: 0%
This completes the glossy look of your circle once you select “OK” to apply the changes to the layer style for “Gloss”
Note: The 21 pixels “eats” away at the ellipse to leave a mostly transparent area. The resulting illusion is a glossy button or sphere.
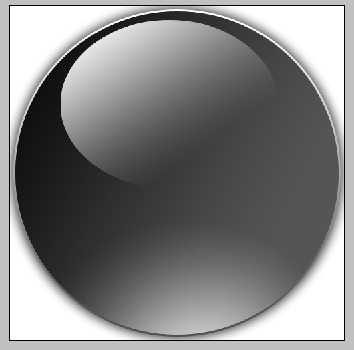
The next step is to turn this glossy circle shape into a logo. One of the best options to try is text or a design.
Click on the “Shadow” layer then select the text tool to place a couple of letters onto the canvas. Create a text box large enough to show the Font that you wish to display.
Note: By selecting the “Shadow” layer before hand, the text box creates a new layer between the “Gloss” and “Shadow Layers” This allows the glossy sheen on the top-most layer to overlap your font while the font stays above the shadows.
Next, type your company name, initials or choose a symbol for your design.
If you are not satisfied with the simplicity of the plain text for your logo, add some styles with the blending options to the text. This is what we applied to ours:
- Drop Shadow
- Bevel and Emboss
- Color Overlay
- Stroke
This was the result:

We also replaced the words with a music note via the shapes tool:

Or combine them together with some color changes for the final logo:

You aren’t limited to circles either:

Experiment with a variety of different options to create the right glossy logo for your needs.



jim
terrible tutorial! how is that even glossy